Showing posts with label DIY. Show all posts

Wednesday, March 26, 2014

Craft time

I miss my knitting time. I have tried to spend some time each night to knit/work on some projects. I would love to be able to make a good supply of hats for my son before the next winter hits. I just have to figure out what size head he will have. I also want to make mittens for my husband and maybe something for me.


For me..What do you all think?


For my son


For my husband...I would add a flip top  cover. 

Ciao,

Tuesday, October 22, 2013

Hemming jeans

As you all know I'm a bit crafty. So this week end, I figured why not hem the maternity jeans my wonderful mom got me. Now, these jeans started out 6 inches too long.

So the first thing I did was measure where I wanted these jeans to fall on me. Then I folded them up (like when you crop jeans) and pinned then on the hem. (this took a few tries since I had to pin them a few different times)


Then I sewed really close to the hem of the jeans. I made sure it wasn't underneath the hem, but super close to the hem.
                                  

After that I cut off the extra fabric. (Be careful here, you don't want to cut off your hem line, I did that and had to make some changes)


And last, remove the pins, fold the hem back over (iron it if you want it flat) and wear your newly hemmed jeans!


Not bad if I don't say so myself. 


Monday, June 24, 2013

Knitting E-book

Happy Monday!

Today, I'm joining a wonderful link up. Are you ready...


And, I'm reviewing an Online, knitting E book.  As this is my first review, I'm super nervous that I'm not going to do this right. So please, please, please let me know what you think. 


Lace knitting! Have you done it? I have. Contrary to popular belief, lace knitting is pretty hard. For someone like me, who has knitted for a long time, I find lace knitting hard. I always stick the the easy patterns for lace knitting. Once in a while, I do venture out and try a intermediate pattern, but I always feel that I mess them up. Do you ever have that feeling? For me, it's because some how, my lace holes, look bigger, or smaller than they do in the picture. Which really bugs the perfectionist inside me.

While reading this book, I went in with a clear mind. I looked at the book, patterns and pictures. The first pattern looked doable. It makes me excited, because, I feel I could actually make the Celio shell. It really didn't look too hard and the pattern was super easy to read. (which is a plus for me)

The second pattern looks a bit more difficult. I never learned to read patterns in the graph/chart style. So those are a turn off to me right away. I have tried many times to teach myself how to read those, but..it was an epic fail. Which leads me to believe I will never be able to make the wrap. If you know how to read the graph/chart type patterns, then I guess it would be easy. 

The last pattern looked perfect for me. It's a lace to go on a pillow case and it's beautiful. I think if you are learning to start lace knitting, try the third pattern. 

So, what do you think about me review?

Wednesday, May 8, 2013

I pinned it and did it :)

Hello,

    It's Wednesday and I'm linking up with Michelle from the Vintage Apple for


And with Little Daisy Mae from This Kind of love for 


Just because I'm loving this pin. 

This is a first type of post for me. I'm posting based off of a pin I found. (Yay Pinterest). This is the pin


I wanted to do something like it with a lamp shade that I had. The issue is well- my lape shade is not straight up and down like the one in the pin. Mien has a curve- so the ribbon wouldn't look as good. Instead I added bows and  flowers. 


The bows are from this pin:  (And they really weren't that hard to make at all) 


Ciao,


Monday, April 29, 2013

Crafty space.

Can I just say I have a wonderful husband.  I love him, he listens to me, and he likes to support my hobbies. He likes to give me time to work on different things. The sad thing is he also likes to make a mess. A huge mess, that needs to be cleaned almost everyday. (I know I used to be messy but I have slowly become more a of neat freak.) So, when my husband said that he is going to give me my own space to work on and store crafts (even thought it is one corner of a room) I'm super excited and of course went to Pinterest for ideas.


Just some small ideas...What do you all think?

Monday, April 15, 2013

Books n Chilli n Knitting...Oh my

Hello all,
        After I made a big decision about NOT letting the weather get to me, guess what. We have sun! Sun (I know...what is that) Anyway, the decision was to spend time indoors, cleaning, making chili, reading books and knitting. But now that there is sun, maybe I will go outside for a nice long walk with Winston.


So, today I plan to make my classic Chili and for tomorrow it will be spaghetti with homemade sauce. I'm reading and knitting to build an inventory for my shop. Yes after a lot of thinking I have decided to go ahead with the shop. Anyways if you want the chili recipe you can go here. To let you know there will be no recipe for the pasta sauce mainly because its a secret and also because it's not sauce it's gravy as the pin below says.


 Oh the many problems of being Italian.

 Ciao,


Monday, March 4, 2013

Dog bed tutorial

I love to work on little projects and knit and sew and embroider. One thing that I think I'm pretty good at making myself is...
 DOG BEDS


Above, Winston is sleeping on the one in the kitchen and below is the one that is in the living room.

What I have posted below is the process of me making the one that sits in the backseat of the car. 


1.  I picked the fabric- I made sure it was fleece. In the above two I used a fleece blanket from my old high school day, but for the one in the car I used less than a yard of fabric. 
2. I cut the folded and cut the fabric to be the right size for the pillow I wanted to make. 
3. I turned the fabric inside out, pinned and sewed three side of the fabric together, leaving one side open for my to stuff the pillow. 
4. I flipped the fabric so it was the right side, stuffed the pillow and then using the invisible seam stitch  sewed the pillow shut. 

It is a very easy process. I had to hand sew everything so my pillows take me about 2-2 1/2 hours. If I had a sewing machine, it would be much faster. I hope you can use this to help you make a pillow/bed for your dog or cat. 
Ciao, 

Wednesday, February 27, 2013

OHP- projects, dance and more

This week I haven't really been on pinterest that much, yea I have the five to ten minutes or so right before my shift starts at work, but I haven't spent a lot of time on pinterest.  Anyways, I have been pinning some wonderful items.


Some fun weekend projects- I love the knitting one. 


A puppy in a coat


and some ballet pins.

 Now that you checked out my Oh How Pinteresting Wednesday please head over to the Vintage Apple and check out other links!

Ciao,

Saturday, February 16, 2013

Plants

Last night my husband and I went shopping for seeds. We have started our herb garden. I promise I will post a  picture of what it looks like when the herbs are in full bloom.

We found the sunniest window and set up a small shelf right under it. We planted all of our seeds adn then we put saran wrap on top of the plants. We did that to keep the water in and to make sure that warmth stayed with the plants.  Now we just have to let the sun do it's business.

We also got some flowers to and planted them in some containers. I'm hoping that by container gardening, I'm going to be able to learn how to have a green thumb. To help with that, my husband and I brought a book from Better Homes and Gardens. It's all about growing herbs and veggies.

Better Homes & Gardens Vegetable, Fruit & Herb Gardening

After reading through the book, I realized I have a lot to learn, but I don't mind learning as a go. I have also decided that I am going to grow an Apricot tree in a container in my apartment! Then, when it produces fruit, I can give it to my mom (who loves apricots) and I can make apricot jam (which is my mom's favorite jam).

Apricot tree 'Early Moorpark'

The herbs we planted are:
  • Lemon Basil
  • Sweet basil
  • Cilantro
  • Mint
  • Oregano
  • Parsley
  • Dill
  • Chives
  • Chamomile
We also planted:
  • Forget-me-nots
  • Shasta Daisy
  • Sweet Peppers
  • Spicy peppers 
As well as we still have our garlic and scallions growing. 

Ciao,

Thursday, February 14, 2013

Valentine's day gift

Since I know my husband won't be seeing this until AFTER I give him his gift, I'm going to post what I made for him on here.  Using the pin that I posted yesterday (and for a few other days) I made a

DATE NIGHT PASSPORT! 


I  made a list of local restaurants  some we've been to  and others we haven't even touched. And some I didn't know existed.  After that I made a list of many different date night ideas ranging from free to super expensive. ($$$)

Finally I put the book together and made my money code.

I hope he likes it. 

Ciao, 

Thursday, January 31, 2013

Printables

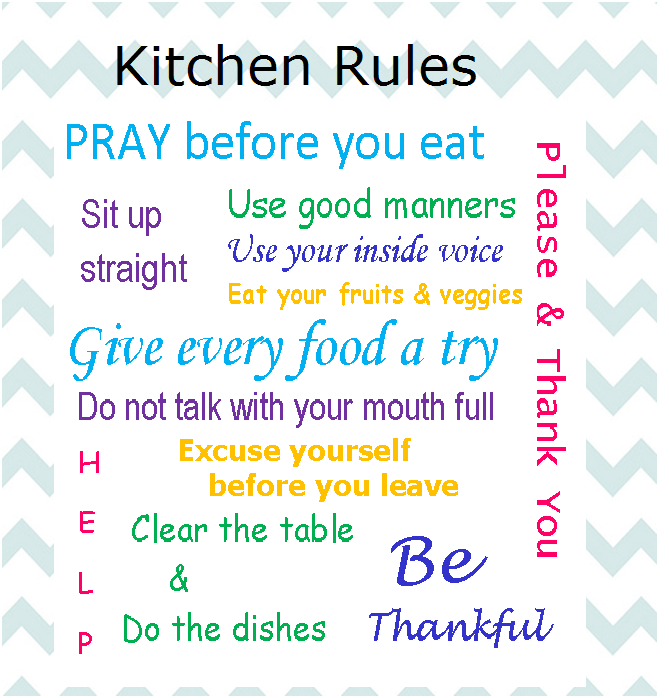
Printables are the new things. You print something off of your computer and you can put it in a frame and hang up somewhere in your house. They are pretty cool. some people print them out and transfer them to other things like pillow cases and totes. I don't know how they do that, but I would love to learn.

I, my self have joined the printable  gang and have been looking for things to print out. On pinterest there are a bunch of free printables that range from holiday specific to room specific (like Kitchen and bathroom) to just being plain old fun.

I like them, and some of them are great to print out, but others can be just as fun to make.  I made one for you all to print out, and I made my own using stuff from other blogs.


This one was made using a frame from Shabby blogs and then adding text. I printed it out, and put it in a fabric covered frame. It looks very pretty on the end table in our living room. 


This one, if you click on the image it will take you to my photobucket and you can download it and print it out. YAY! Please share what you did with it. 
Enjoy you printable,

Monday, January 21, 2013

Shabby Blog Shout out!

I would like to give a shout out to Shabby Chic Blogs. With out them I wouldn't have been able to make any of the buttons I made. They have a great tutorial. They also provide freebies. One of those Freebies I acquired the pink frame I used. I know it is hard to read, but blow it up and in the frame you can see Shabby Chic Blogs. They are an awesome blog which I suggest checking out.

Friday, January 18, 2013

Let's talk Fridays-DIY

Free is nice. I love looking on the internet and finding some free item for my blog or a free template ofr a craft or even, yes a lesson plan or knitting project. But I wonder....how do these wonderful people get the free stuff? I mean, somehow one needs to either buy paper, take a picture of it, then do a bunch of designs on it to make a pretty post right?I made my buttons using word clip art. That was it, but word clip art doesn't have a lot of options to choose from  and sometimes, it's not the best thing.  So where do these people get this free stuff?

There are a few website I would like to share with you because they do have some pretty awesome free items for just about any Do it yourself-er

http://www.thecottagemarket.com/

http://shabbyblogsblog.blogspot.com/

http://www.freeprettythingsforyou.com/

The above sites seem pretty cool and have  a ton of awesome free stuff. Now, how do they make it? That is my question. What are your thoughts and comments.


Related Posts Plugin for WordPress, Blogger...